Electronic Tenant Payments
The Spectra Pre-Authorized Tenant payments Module allows users to create a file that can be uploaded to the bank to collect tenants rents. There are a variety of bank specific single and multi-account formats as well as the default Standard CPA 005 format for Canada and the NACHA for the United States. We will give an over view of the basic process. Some setup process may vary by format. For specific setup steps,the bank specific instructions can be downloaded here:


Bank Setup
The following steps may vary depending on which format you have purchased.
For Multi-Account formats: Go to Find - Banks > Select and drill down on the the desired bank > Click Bank Edit > EFT /PAP Info.
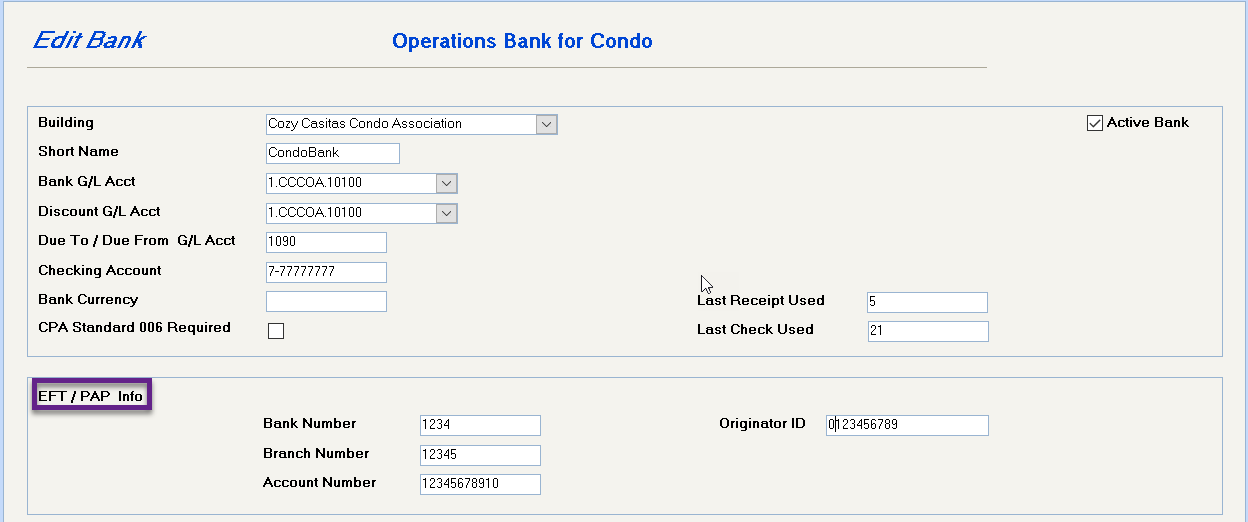
Your bank will supply this information. Complete these fields and save.
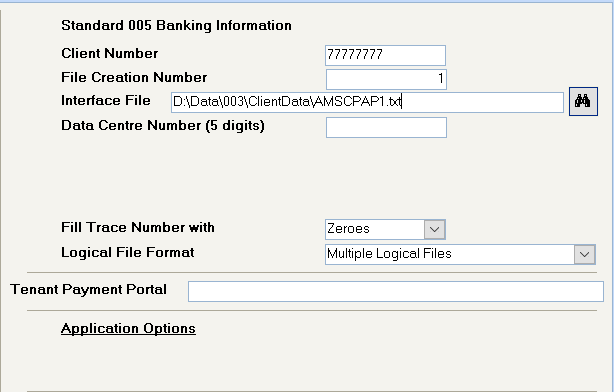
1. Go to System Tasks – Spectra Utilities – Configuration File (Extras) to enter your banking information. This information will be available from your banking representative.
This is a single physical file with various bank account in the file with distribution that tells the bank how much to put in each bank. We think this will be the more common format of the two, but you should ask your bank if yours is a Payment Distribution file.
This is one physical file with several single files in it.
If you have the Clearing Account Distribution to Multiple Accounts version, ensure that each building has its own individual bank account set up as the default receipts bank on the Find – Building – Accounting – Banking/Control screen
Tenant Setup
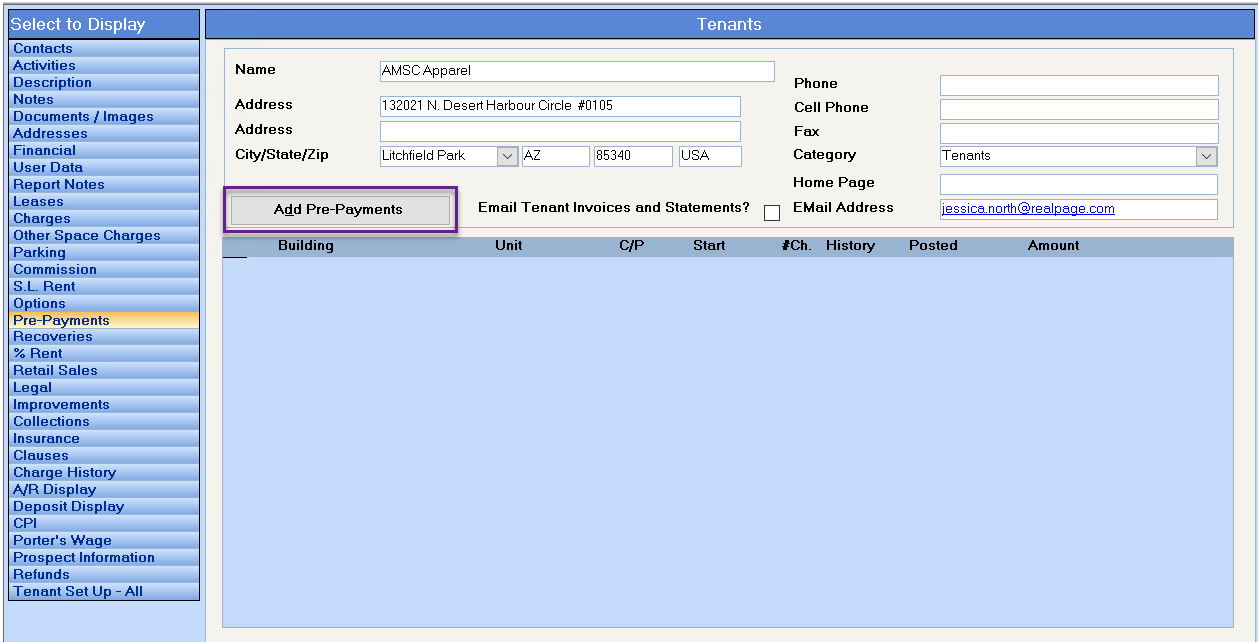
Setup tenant PAP information on the Tenant Pre-Payments screen. Click on the Add button to add a new PAP record
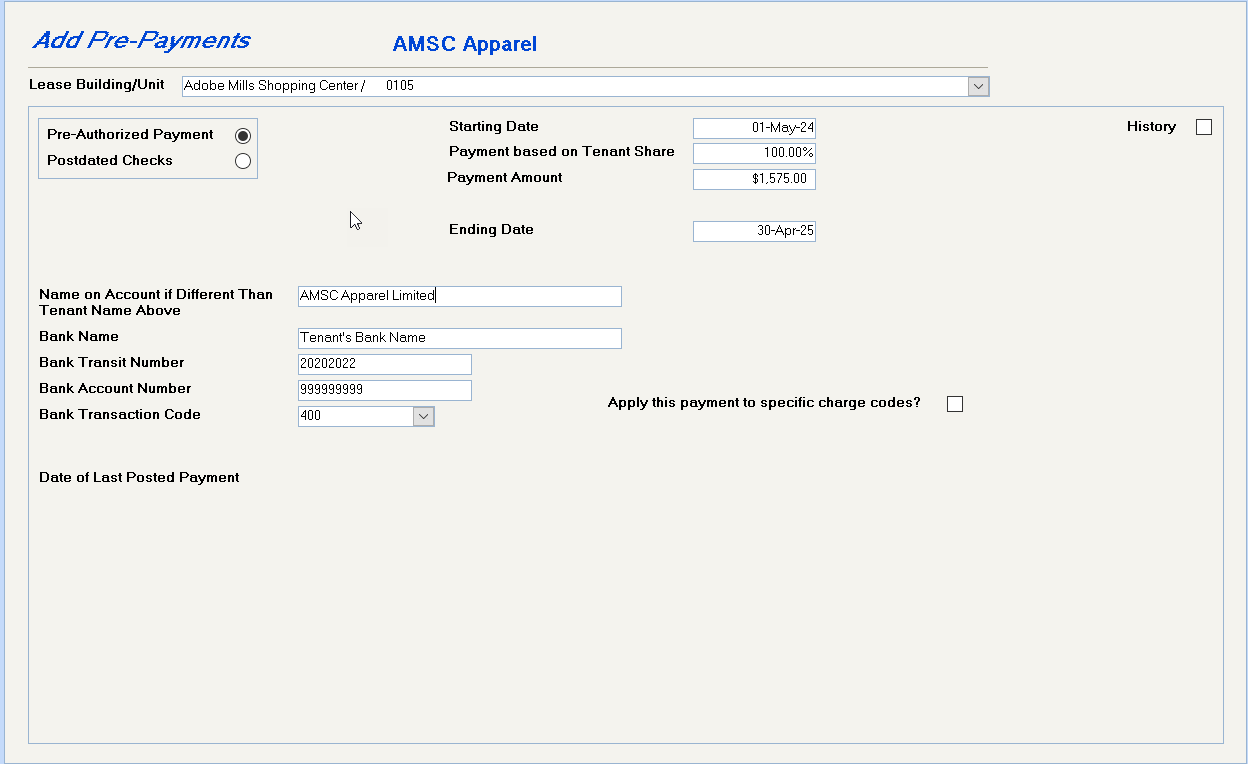
To automatically stop the Pre-Authorized Payment.
This field has been added because the tenant on the lease may not be the payee of the rent.
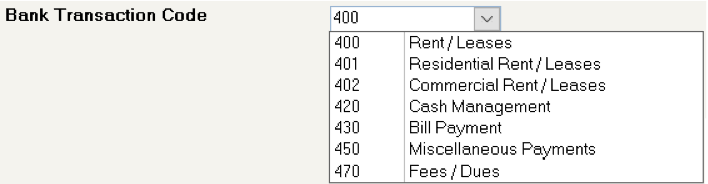
The default description code is 400 Rent/Leases, but you may select an alternate code for condo owners or other types of payments.
This optional field enables you to specify that payments are to be applied to specific charge codes.
You may set up multiple pre-authorized payment records and designate one to be for a limited period to be applied to a specific charge, e.g. Special Assessments.
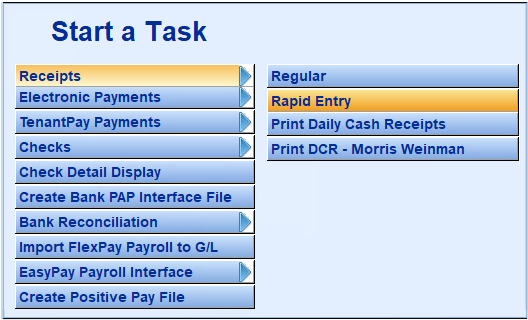
Process PAP File
(Banking – Receipts – Rapid Receipts).
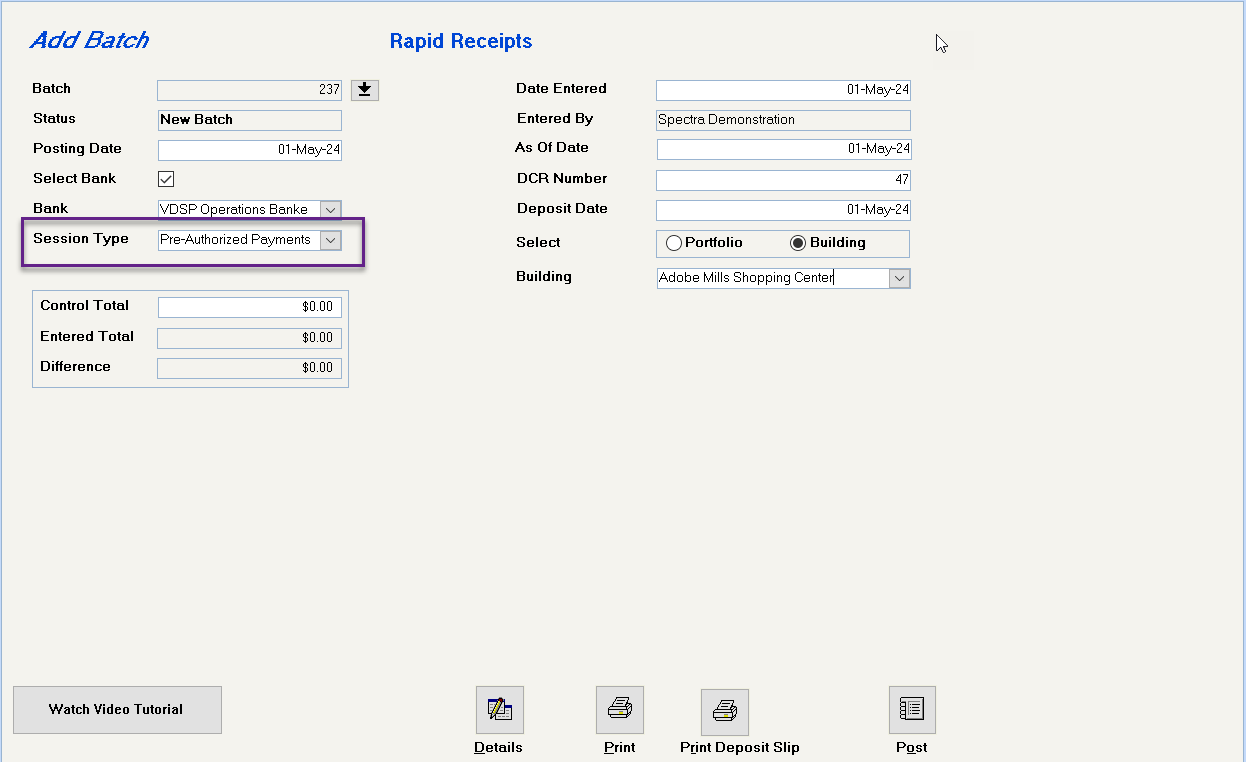
Enter the posting date for the payments.
Select a bank and the system will automatically assign a DCR number.
Select "Pre-Authorized Payments" as the batch session type.
Click on the Enter Detail button to process the receipts. You will be prompted to confirm the dates of the payments and continue with processing.

Each tenant that has a pre-payment dated the posting date of the batch will then show. The tenant’s current balance and the amount of the pre-payment, as entered on the tenant, will show.
The pre-payment amount can be modified to equal the balance owing if required.
If the payment is required to be applied against specific outstanding charges, click on the pencil button to the left of the tenant’s name to open the receipt detail.
Once the information has been reviewed, click on the Close Window button to return to the batch screen. The batch should then be printed and reviewed for accuracy, and then posted. The information required for the PAP interface file is automatically created when the batch is posted.
After posting each batch of Rapid Entry – Receipts – Pre-Authorized Payments, proceed to the next step to Create the Pre-Authorized Payments File to be updated to the Bank. The reason is that some, and possibly all, banks will not accept a file with more than one deposit date. You may process multiple batches of pre-authorized payments as long as the deposit date is the same for all these batches
Create Bank PAP Interface File
(Banking – Start a Task Menu)
Please note, the following screen can vary depending on the format purchased.

Run the Create Bank PAP Interface File program to create the text file to send to the bank. One text file is created for all the individual bank accounts.
Please note, the following screen can vary depending on the format purchased.
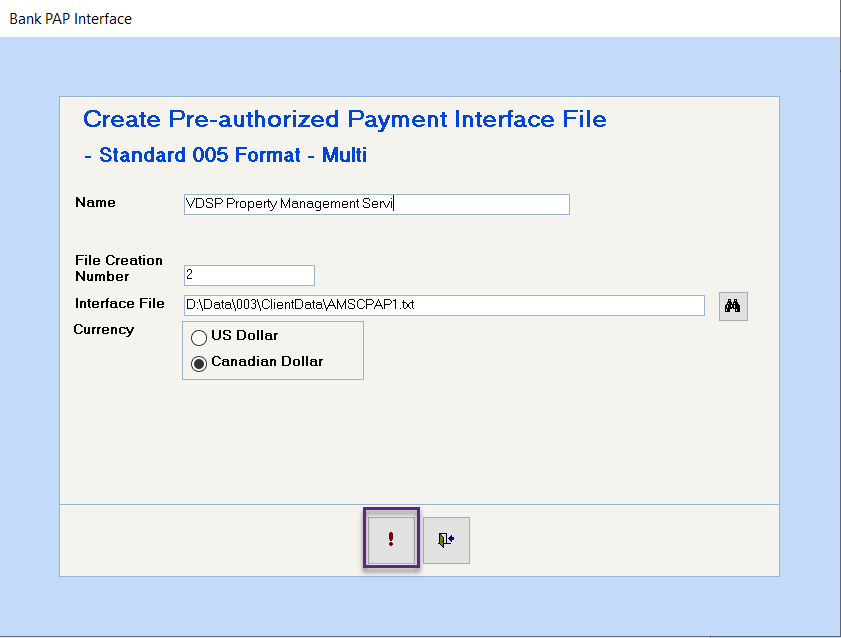
Defaults to the name on your configuration file.
Enter the Client number supplied to you by the Bank
Automatically assigned by Spectra
Anywhere you specify, must have a "txt" extension and you need to specify the directory where the file is to be located.
Refer to the individual Bank PDF files for specific details for your format.
Click the exclamation point to create the file.
It’s very important that you click on the Create File button just once. All your PAP transactions are in a temporary file in SPECTRA. If you click on the Create File button a second time with the same Interface File specified, your original file will be overwritten with an empty file, and your bank upload will be empty.
At this point, you would use your bank software to upload the PAP for processing.