Maintenance Management
Building Maintenance codes
Building Maintenance Codes are used by the Maintenance Module, which is licensed separately. They allow you to track maintenance costs by these codes for individual units or for the building in general. The codes are linked to G/L account numbers and every time these account numbers are used in Supplier Invoices or Handwritten Checks, the system will default to the Building Maintenance Code connected to that G/L account and prompt you for an optional unit number.

From the Navigation Pane - System tasks > Control Codes > Building Maintenance Codes
Click on the dropdown box to search for an existing building maintenance code.
Click on the Add New Record button to add a new maintenance Code.
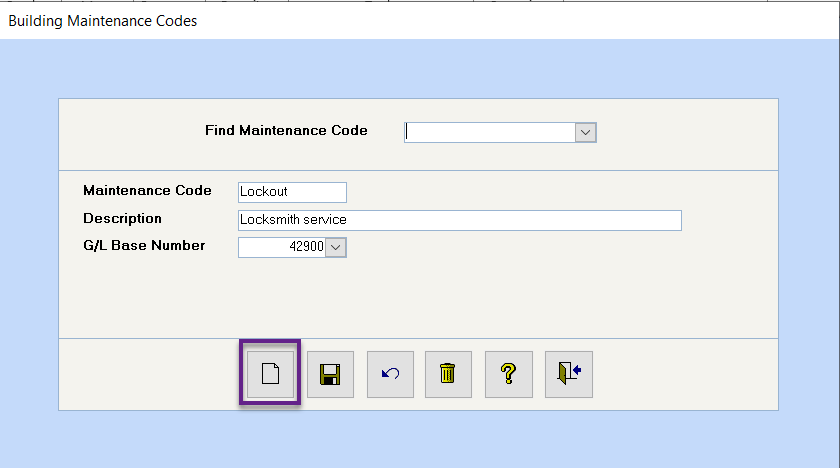
Enter the G/L Account number to which this expense will be charged. This account number is the key to the whole operation of the Maintenance Module. Click on the Save button. When all codes have been entered and saved, click on the Exit button.
When you code an invoice to one of the G/L Base Numbers, e.g. 4280 in the above example, the system will then prompt you to enter the Maintenance Management information.
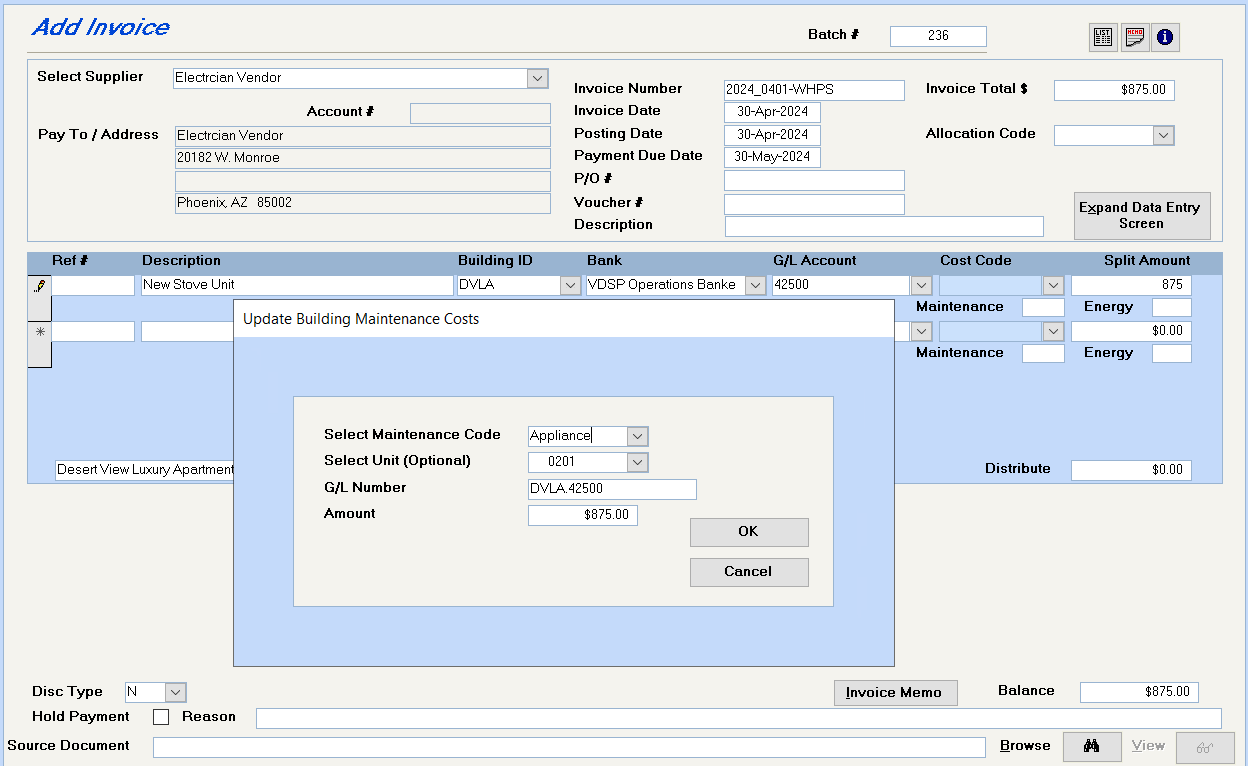
Use the drop down to select the maintenance code.
The selection of the unit number is optional. If the unit number is not entered, the system assumes that this maintenance cost relates to the building in general and not to a specific unit number.
Click OK when finished and complete the invoice or handwritten check as usual.
Reports
Find – Building – Maintenance History screen
Building – Task – Inquiries – Building Maintenance Inquiry
Building – Reports – Maintenance Reports – Unit Maintenance History
Building – Reports – Maintenance Reports – Maintenance Cost Comparison
Building Maintenance History
The Building Maintenance History screen reflects costs tracked by the Maintenance Module, which is licensed separately. The Maintenance Module allows you to track maintenance costs by the maintenance codes for individual units or for the building in general. See Control Codes – Building Maintenance Codes for more information on setting up these maintenance codes.
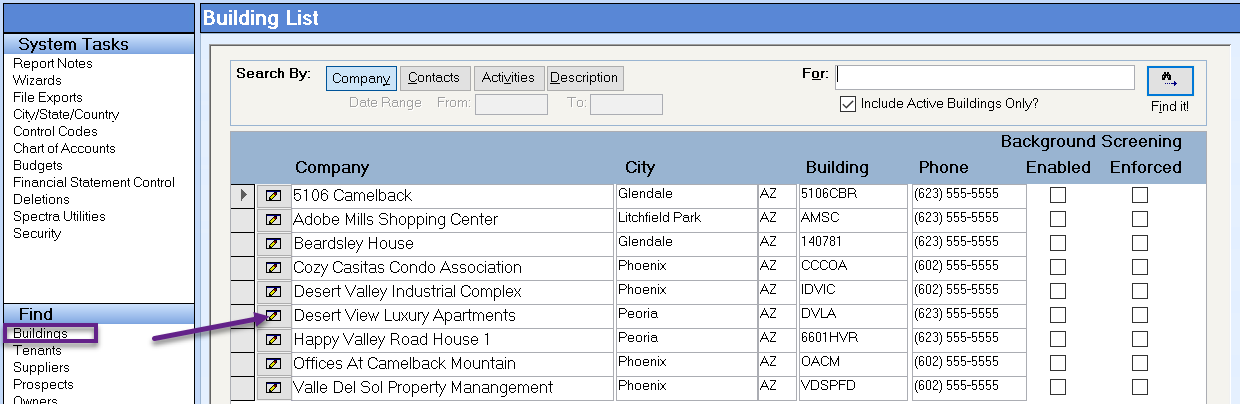
Go to Find > Buildings > Search for and Drill down on the desired Building.
Click on Maintenance History.
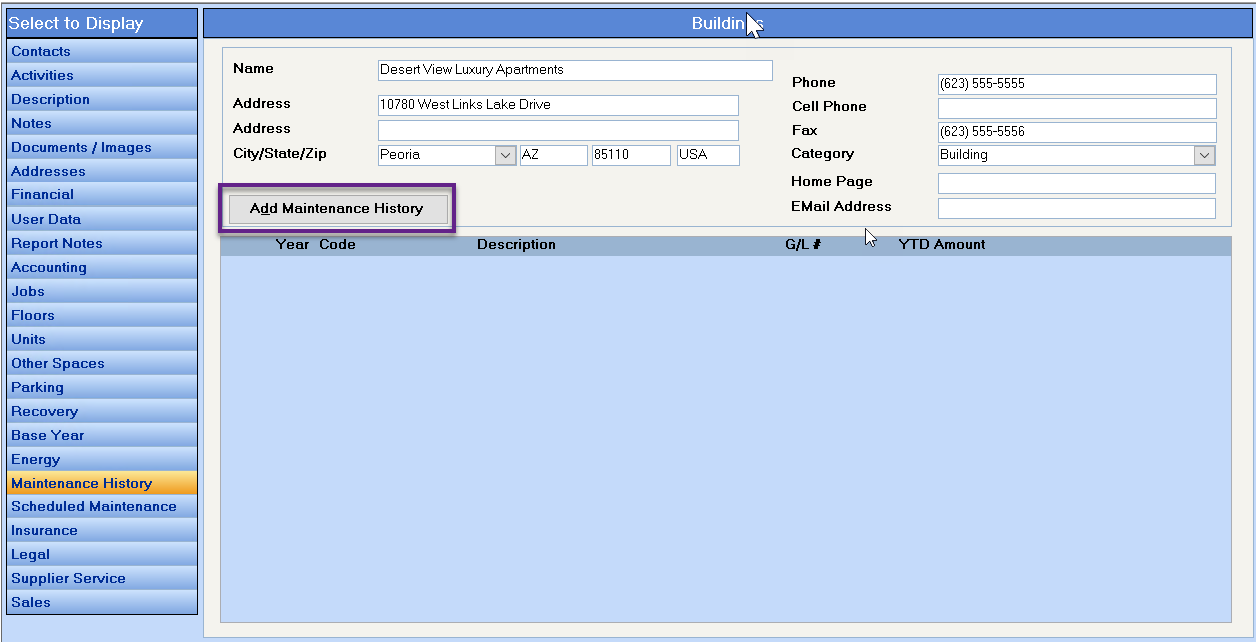
Click on the Add Maintenance History button to add a new maintenance history record. This is not required if you are entering all the maintenance costs from the Supplier Invoices or Handwritten Checks, but is required if you want to add additional maintenance history.
To view an existing Maintenance History record, click on the drilldown button to the left of the Year/Code:
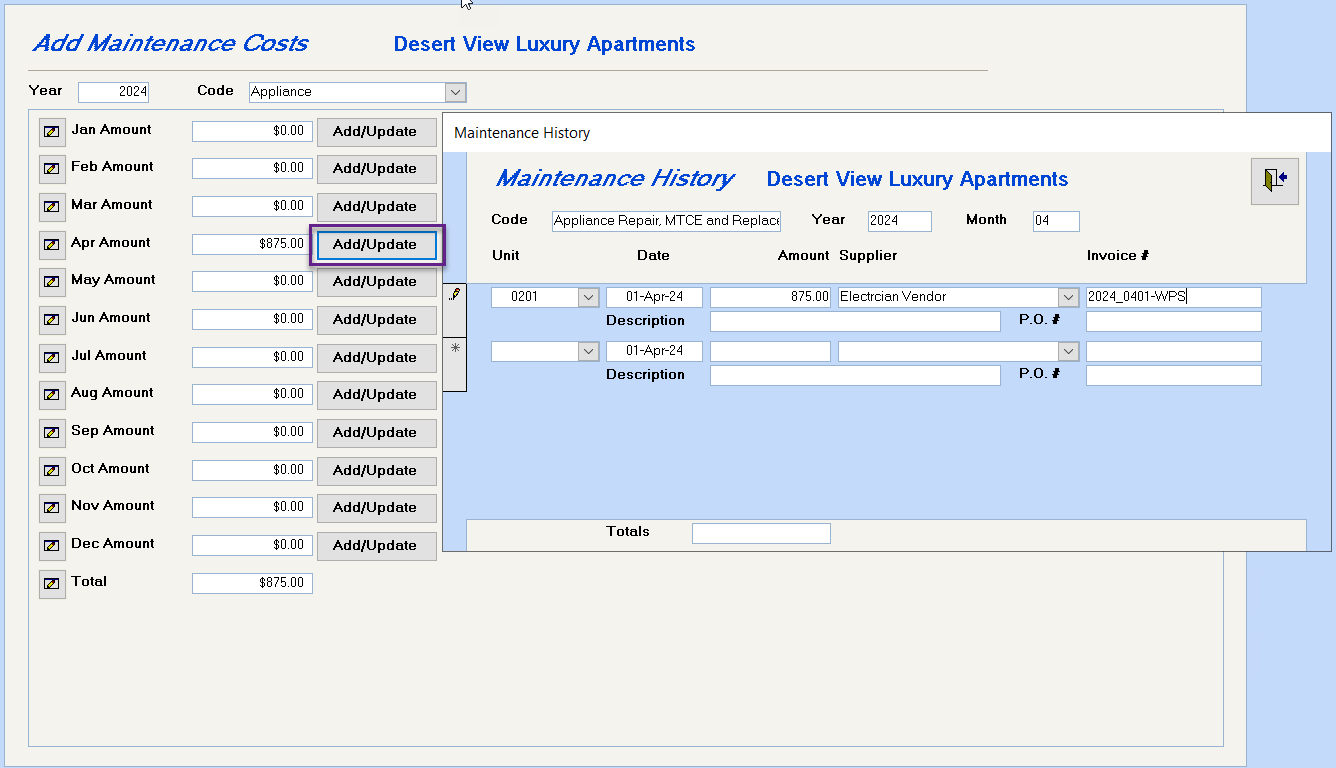
Click on the drill down button to the left of the month to see the details of any amount, or click on the Add/Update button to add additional costs to the Maintenance History.
Building Scheduled Maintenance
Presumably you have already added maintenance codes to use the Maintenance module. If not, go to System Tasks – Control Codes – Building Maintenance Codes to add these before you proceed with the Scheduled Maintenance.
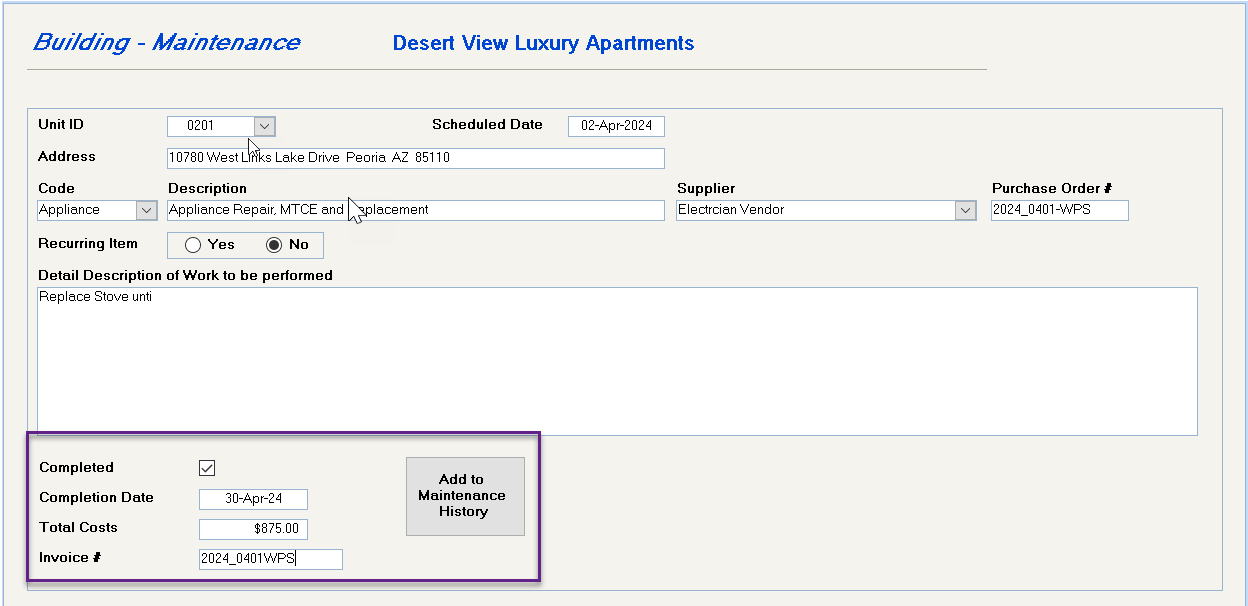
This information is added directly to the Building Database. Go to Find – Building – Scheduled Maintenance screen, and click on the Add Scheduled Maintenance box.
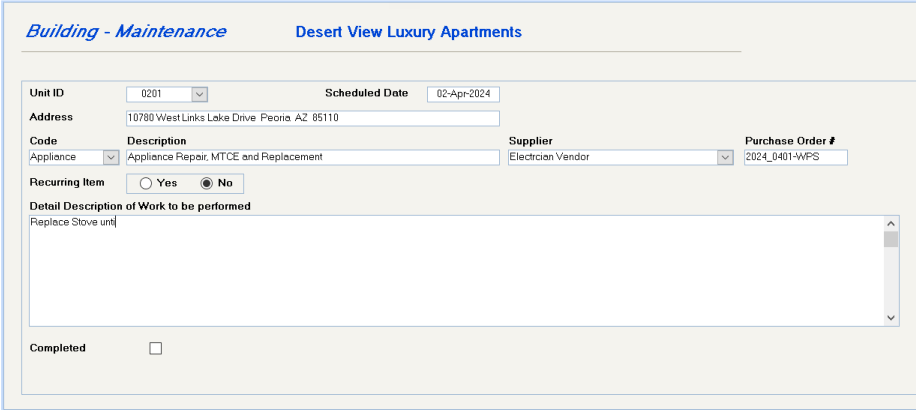
Complete all information on the screen. If this is a recurring item, tick the Yes box and select an option to schedule the recurring maintenance.
The reports or on-screen inquiries are self-explanatory:
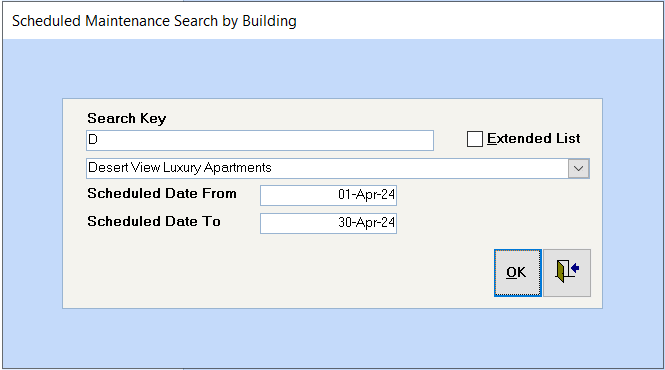
Find - Building - Scheduled Maintenance screen
Building – Inquiries – Scheduled Maintenance Display – search by building.
Building – Maintenance Reports – Scheduled Maintenance
Scheduled Maintenance completed:
Go to Find – Building – Scheduled Maintenance screen. Drill down on the item and mark it as complete. The system will prompt you to enter the completion date and amount. Click the "Add to Maintenance History" button if you want this item to go into maintenance history. If this is a recurring item you can enter the next scheduled date and click the "Re-schedule Now" button.