Tenant Pay Interface
Through an integration with TenantPay, offers your tenants the ability to pay their rent and other charges online - from their own bank web site. Each tenant will log into their own bank web site and initiate a transaction using their unique TenantPay ID number to pay their monthly rent or other amount. The Landlord is charged a small fee for each transaction. Property Managers are notified when new payments have been made and they can quickly and easily pull those payments into your SPECTRA property management software, where they are automatically posted to tenant and other ledger accounts.
The integration is basically a file import/export to pass the information between the TenantPay Admin portal (www.tenantpay.com) and SPECTRA (Release 6.6 or later). Tenants will log onto their own bank web sites and make payments using the TenantPay number you provide them with. Those will be pulled into tenantpay.com and Canadian Property Managers will be notified when payments are have been made via email and can then access this site and export those payments from TenantPay and import them into SPECTRA.
If you are using a third party tenant payment application, other than TenantPay.com, you will need the Generic Tenant Pay Module.
Overview of TenantPay
>Spectra, through an integration with TenantPay, offers your tenants the ability to pay their rent and other charges online - from their own bank web site. Each tenant will log into their own bank web site and initiate a transaction using their unique TenantPay ID number to pay their monthly rent or other amount. The Landlord is charged a small fee for each transaction. Property Managers are notified when new payments have been made and they can quickly and easily pull those payments into your SPECTRA property management software, where they are automatically posted to tenant and other ledger accounts.
Overview of the Process:
The integration is basically a file import/export to pass the information between the TenantPay Admin portal (www.tenantpay.com) and SPECTRA. Tenants will log onto their own bank web sites and make payments using the TenantPay number you provide them with. Those will be pulled into tenantpay.com and Canadian Property Managers will be notified when payments are have been made via email and can then access this site and export those payments from TenantPay and import them into SPECTRA.
TenantPay Setup Process:
• You must read and confirm agreement of the TenantPay User License Agreement
• Provide contact and administrator information
• Provide a blank voided cheque for each of the Canadian banks where you deposit tenant receipts.
• TenantPay will then provide you with a secure Account # and password to access TenantPay’s Admin website and database.
Consider First
Before you upload your Buildings / Units / Tenants to TenantPay, you may need to do some housekeeping in SPECTRA. It’s important to know that the TenantPay system assigns a TenantPay ID to the Unit, not the Tenant. This means that only one ID is uploaded per unit. So, the question arises, How do you handle roommates and subleases?
• Give all roommates in a unit the same TenantPay ID. TenantPay associates the unit number with the TenantPay ID, so all roommates must have the same TenantPay ID, because they are all in the same unit.
• Only the main tenant name will be set up in TenantPay, but when payments are received,the payment will show which roommate made the payment.
Only one TenantPay ID is uploaded per unit, so only the tenant on the Master Lease will upload. When you are in TenantPay’s Admin portal, you can create additional TenantPay IDs and put these on the sub lease tenant.
If you have a situation where the sub lease tenant will be using TenantPay, but the tenant on the master lease will not, then switch them around, so that the tenant using TenantPay will be the master lease.
If you have SubLeases, follow the separate instructions to set up these sublease tenants.
If you are already using TenantPay and now wish to integrate TenantPay with SPECTRA, please refer to the section “Already Using TenantPay” at the end of this documentation.
Building Setup
Tenant Pay Setup
From Building – Select TenantPay Setup – Create TenantPay Upload File

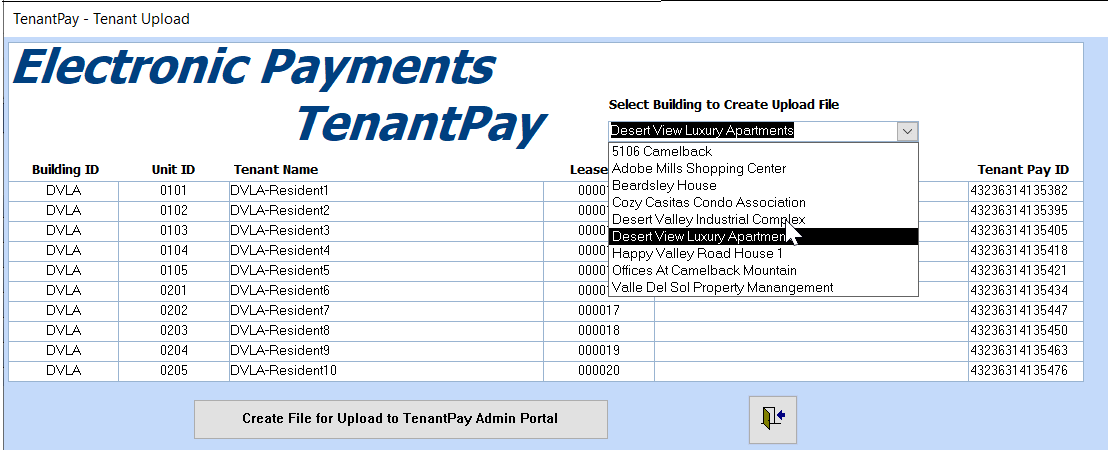
Create Tenantpay Upload File
Select the building in the upper right corner. This will pull up all tenants in the building.
Got to TenantPay
Access TenantPay through Building – TenantPay Setup – Launch TenantPay Admin Portal:
Follow the instructions in your TenantPay Administrator manual for details on signing in, selecting the bank account, adding buildings, etc.
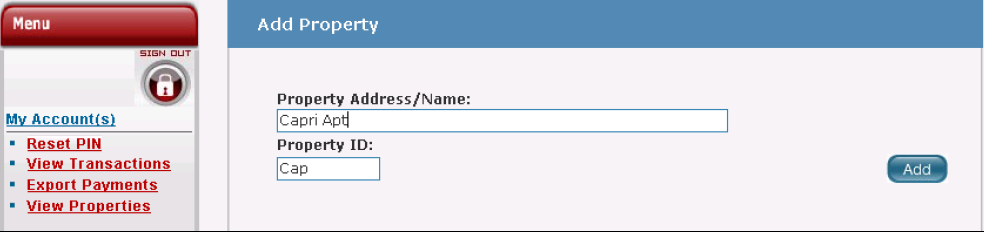
Add Property
When adding “properties” in TenantPay, the Property ID must be the Building ID in SPECTRA.
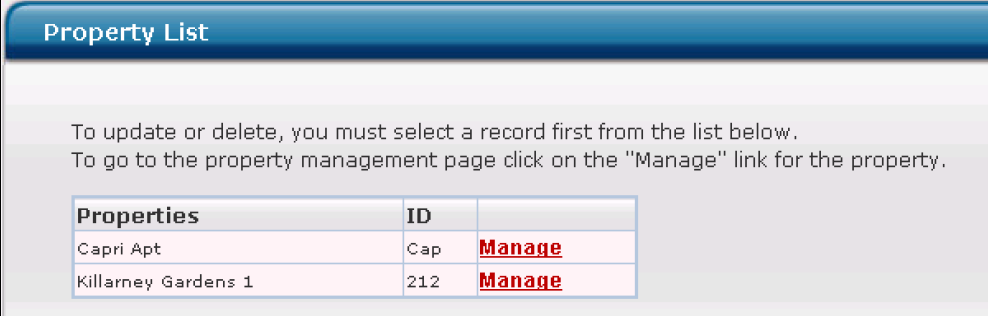
When you have added your buildings to TenantPay, thereafter, select your building from the Property List (below the Add Property section of the screen) and click on the Manage button.
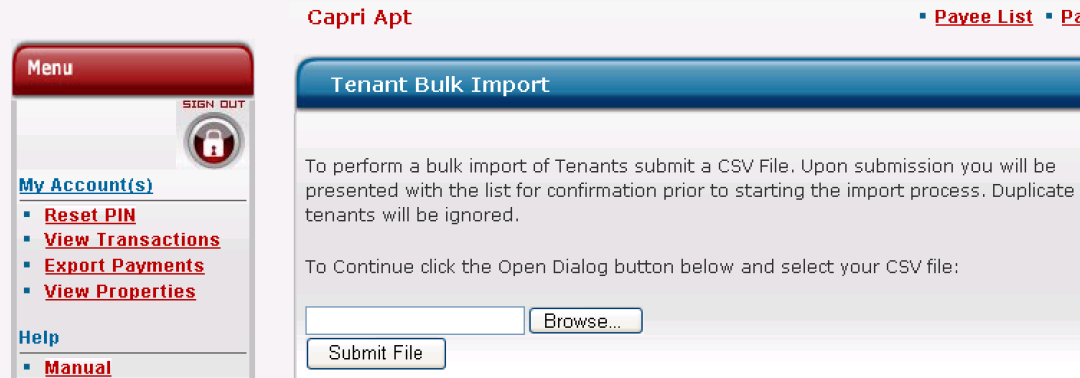
The TenantPay Administrator manual tells you how to add individual units and tenants or you can use the Upload button to upload your this information initially from the file created in SPECTRA. Thereafter you will add or change tenants directly in TenantPay. The Upload button is for first time use only.
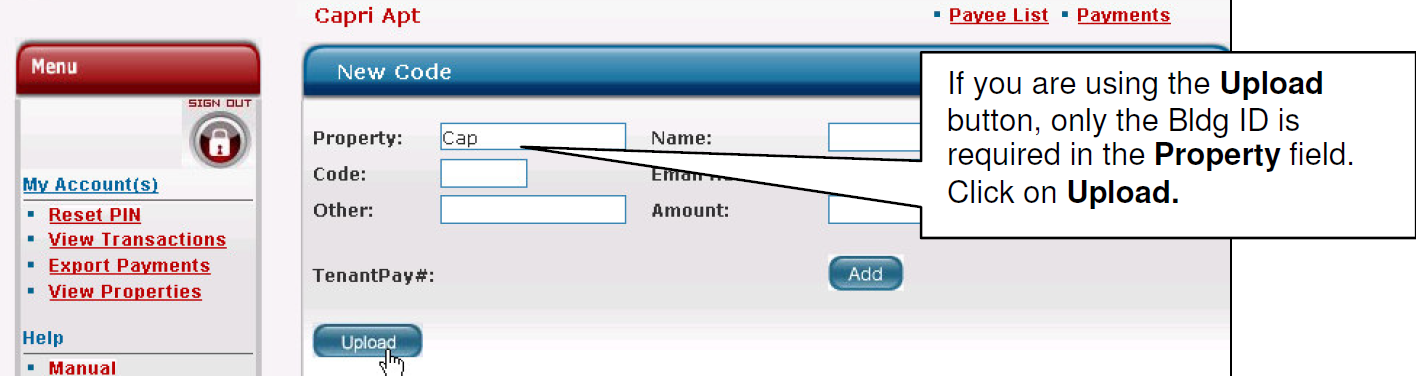
Click on the Browse button to find the file that you created from SPECTRA and then click on the Submit File button to import this fie into TenantPay.
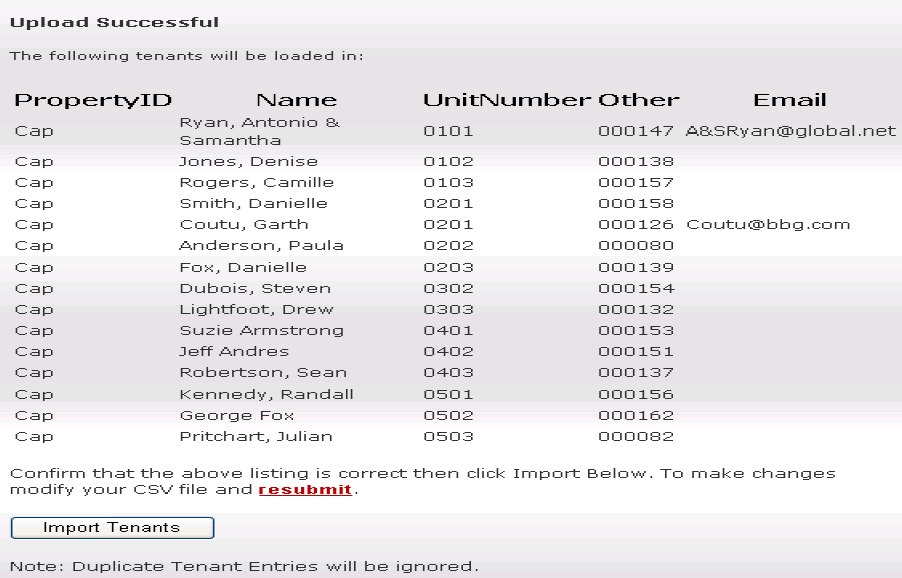
If the upload is successful, the list of tenants from SPECTRA will be imported. You have the option to make changes to the list of tenants and resubmit the upload.
Click on the Import Tenants button to upload this list of tenants into TenantPay.
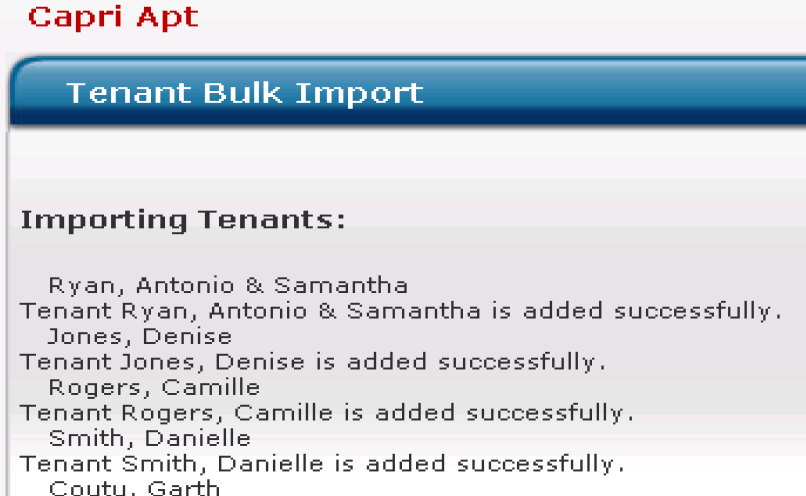
Click on the Return to Manage Tenant List at the bottom of the list of tenants.
TenantPay will then display a list of your tenants with their newly assigned TenantPay IDs. The Code is the Unit number in SPECTRA. Click on Save Data to File now.

When all tenants have been added, click on the Save Data to File button.
When the download is complete, click the Close button on the File Download screen.
(Building – TenantPay Setup – Process TenantPay xRef File)
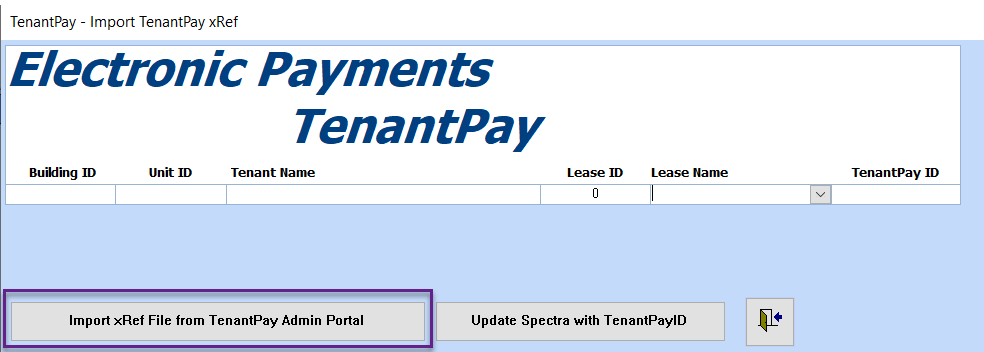
Return to SPECTRA to upload the TenantPay file, which has your list of tenants with their new TenantPay IDs.
Click on this button at the bottom of the screen to start the import.
Find your file name and click on the Open button.
SPECTRA will be updated with your tenant information (including the sub lease tenant)
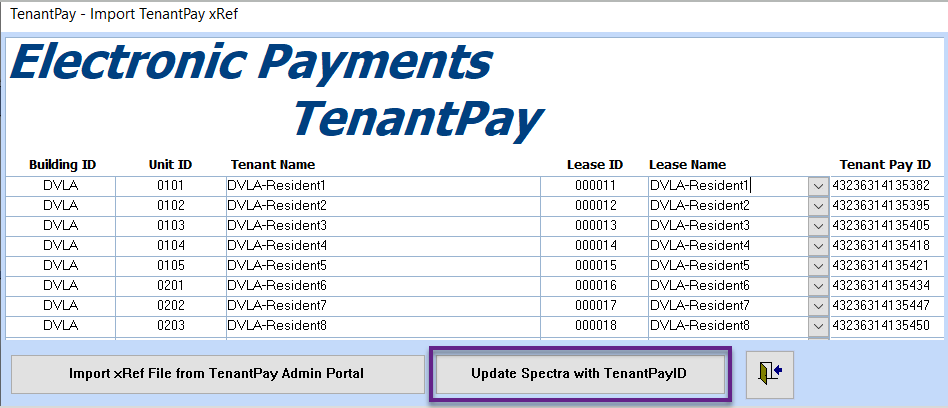
Click on the Update Spectra with Tenant PayID to complete the process.
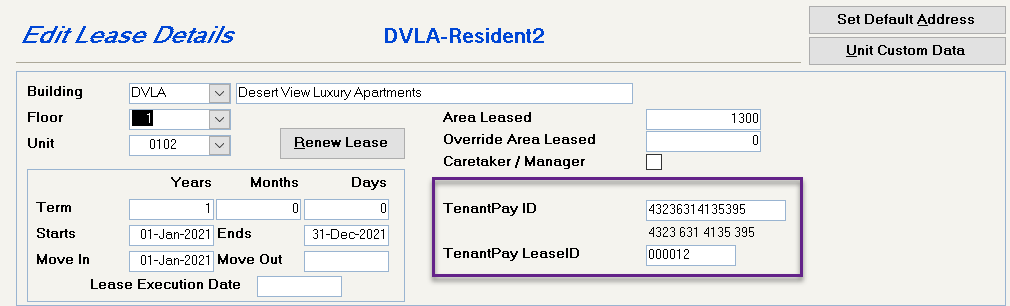
Each Tenant’s Edit Lease Details screen will now show the TenantPay ID:
Announcement Letter to Tenant:
TenantPay provides a sample letter to tenants, which we have modified to enable you to create tenant letters directly from within SPECTRA.
• Use Word to customize the supplied “TenantPy.doc” template to suit your company. Be sure to save the modified TenantPy template in your template directory.
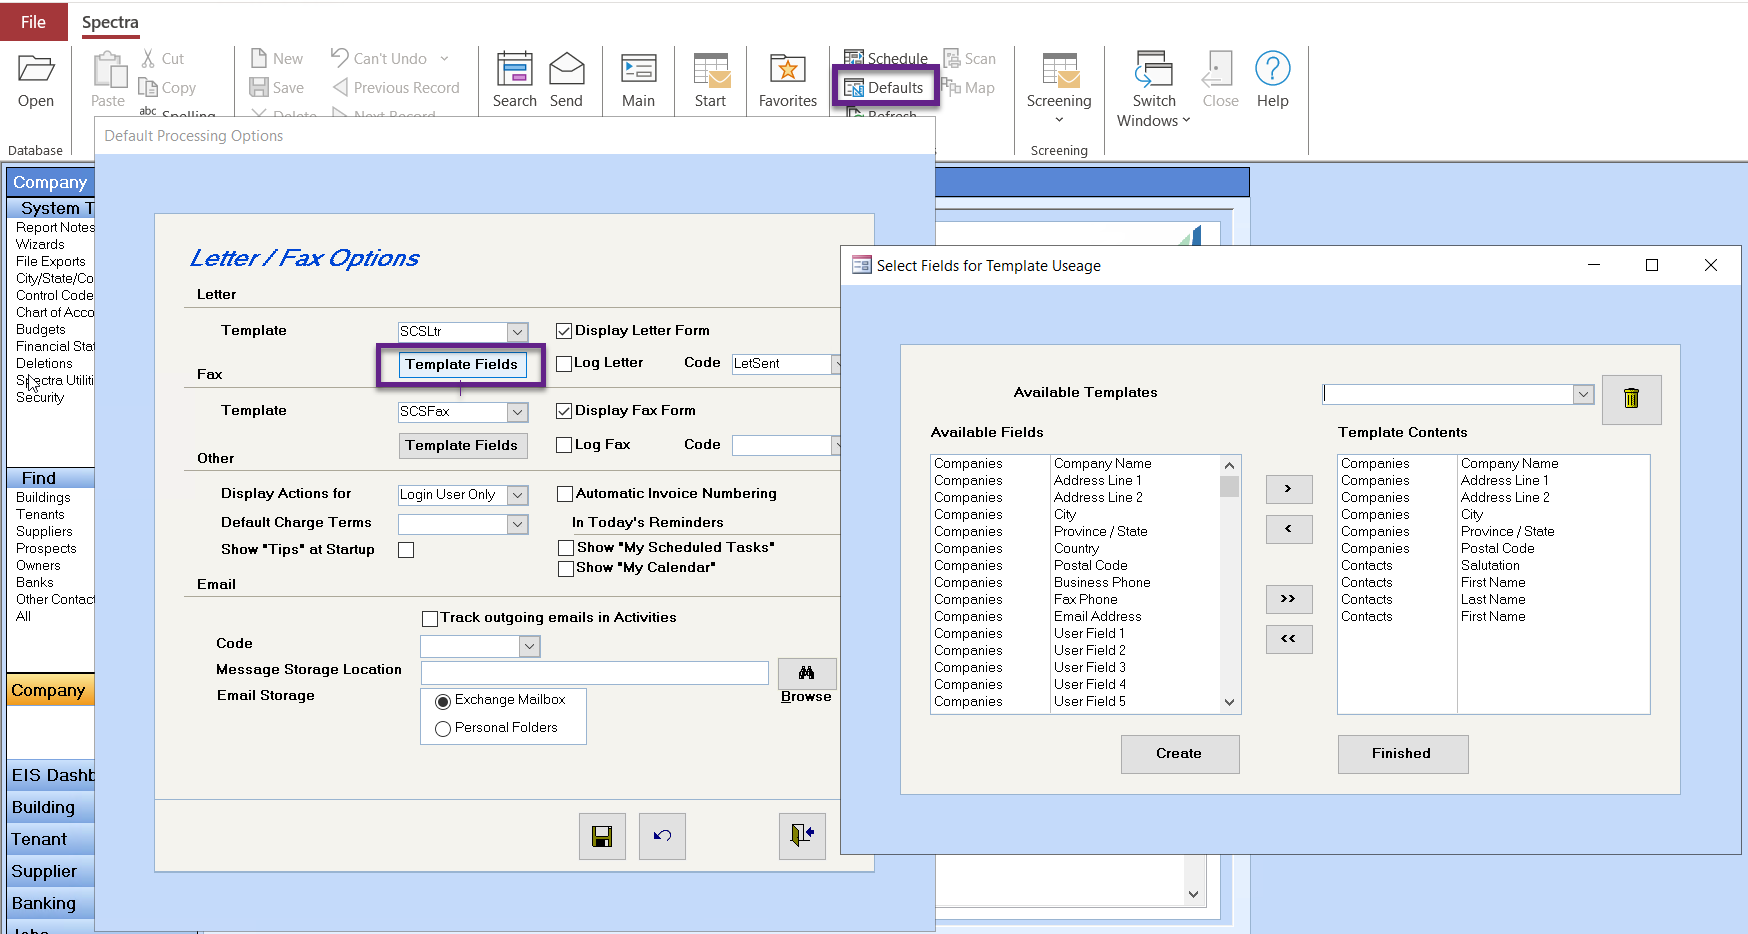
• Go to Tools – Set User Defaults – Letter – Template – Template Fields and add a template called “TenantPy”. (The template must be 8 characters or fewer.) Click on Finish, not Create, as the template itself already exists, but the fields need to exist within SPECTRA.
• It would be advisable to select the option in Set User Defaults to “Log Letters”. If you do, you will be prompted to save the TenantPay letters that you send out as Activity codes
• From Find – Tenants, select the tenant and contact name to receive the letter.
• From the Toolbar, select Send – New Letter – select the “TenantPy” template. The tenant name, address, and TenantPay ID will be automatically inserted into the letter. Save the letter.
• If you have selected the option to Log Letters, an Activity code screen will open automatically and you may insert the letter as a source document for others to see at any time.
Processing Tenant Payments
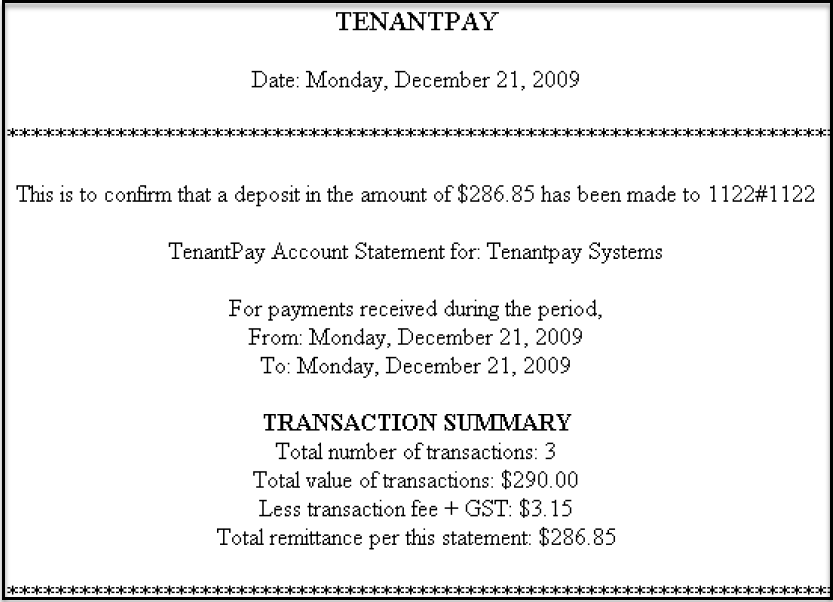
At the end of each business day, tenant payments via TenantPay are uploaded to a clearing center and then sent to TenantPay the next morning. Sometime between 11:00 a.m. and 1:00 p.m. of the next business day, an email will be sent to your email address advising you that TenantPay has payment data for you to download. Here’s a sample:
Process to handle tenant receipts:
• Go to www.tenantpay.com and sign in
• Select the account that the deposit was made to
• Click on – Export Payments
• Under “New Payments” you will see the payments waiting to be downloaded.
• Click on “Save Data to File”
• Very Important: Select the option to “Save” the file. If you select “Open”, Excel will open the file, which will mean that SPECTRA cannot open the file.
• Save the file wherever you will remember to look for it.
• Open SPECTRA
Banking – TenantPay Payments – Process TenantPay Payments

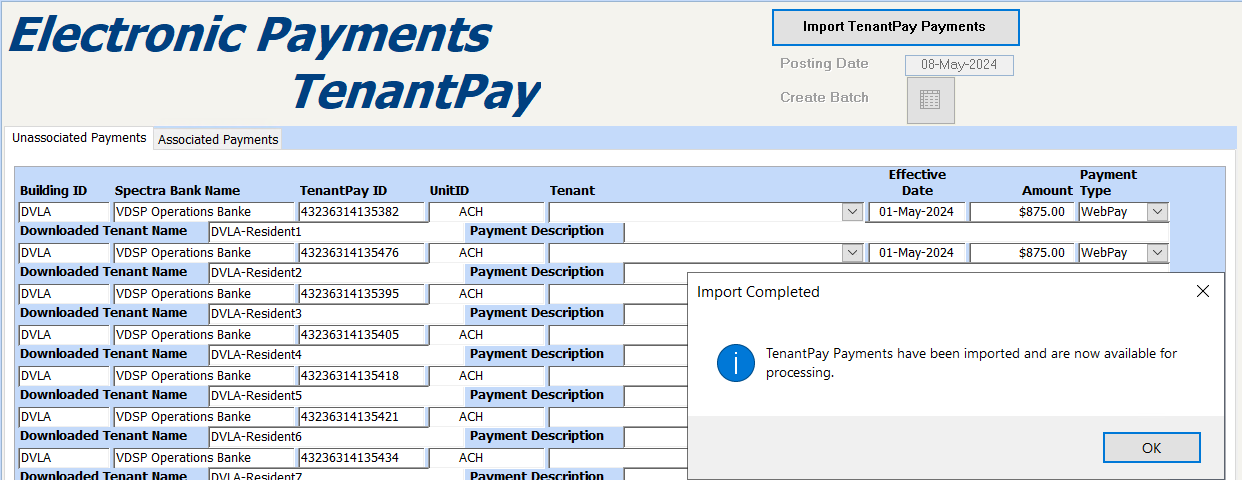
• Click on the Import TenantPay Payments button.

• File the file that you saved from TenantPay and either doubleclick on the file name or select it and then click on “Open”.
• If the import is successful, this message will display on the screen:
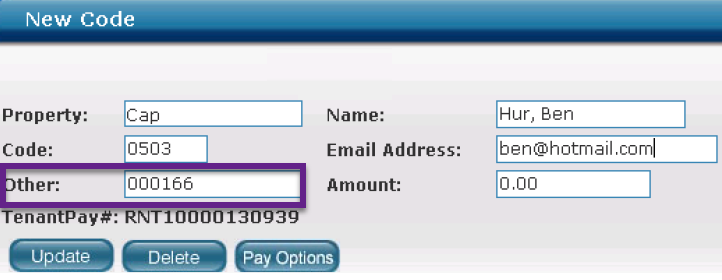
• Two screens are now available – Unassociated and Associated Payments. Unassociated Payments display first because these will be payments where the system could not determine the correct tenant. In the example below, TenantPay is missing the 6-digit TenantPay Lease ID from the Tenant’s “Other” field, so that the system is unable to select the correct tenant. Notice that the screen does show the “Downloaded Tenant Name” to assist you.
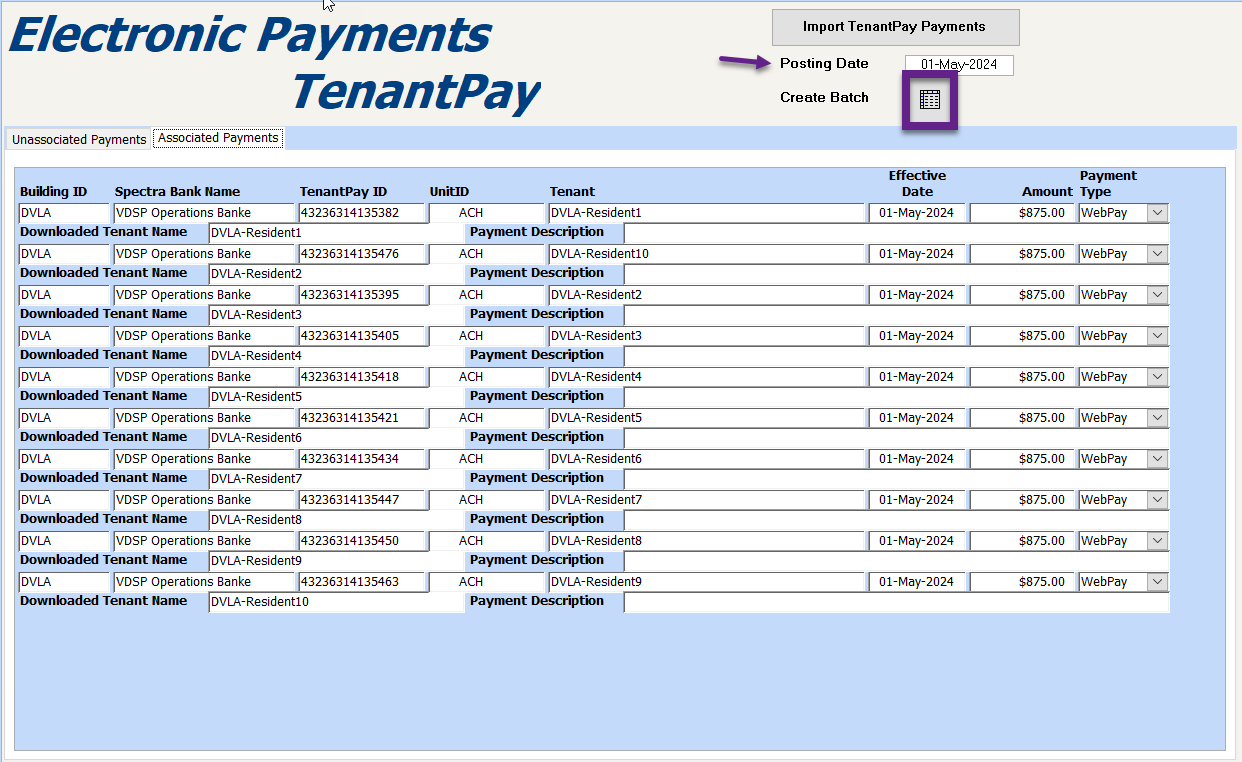
• If there are no unassociated payments, click on the Associated Payments tab.

• Click on the Create Batch to process the receipts. Take note of the Batch Number.
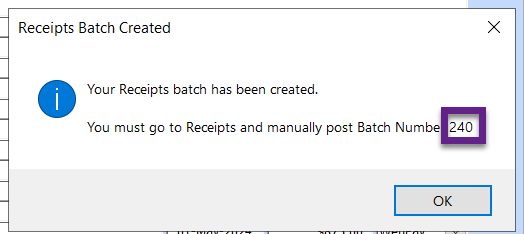
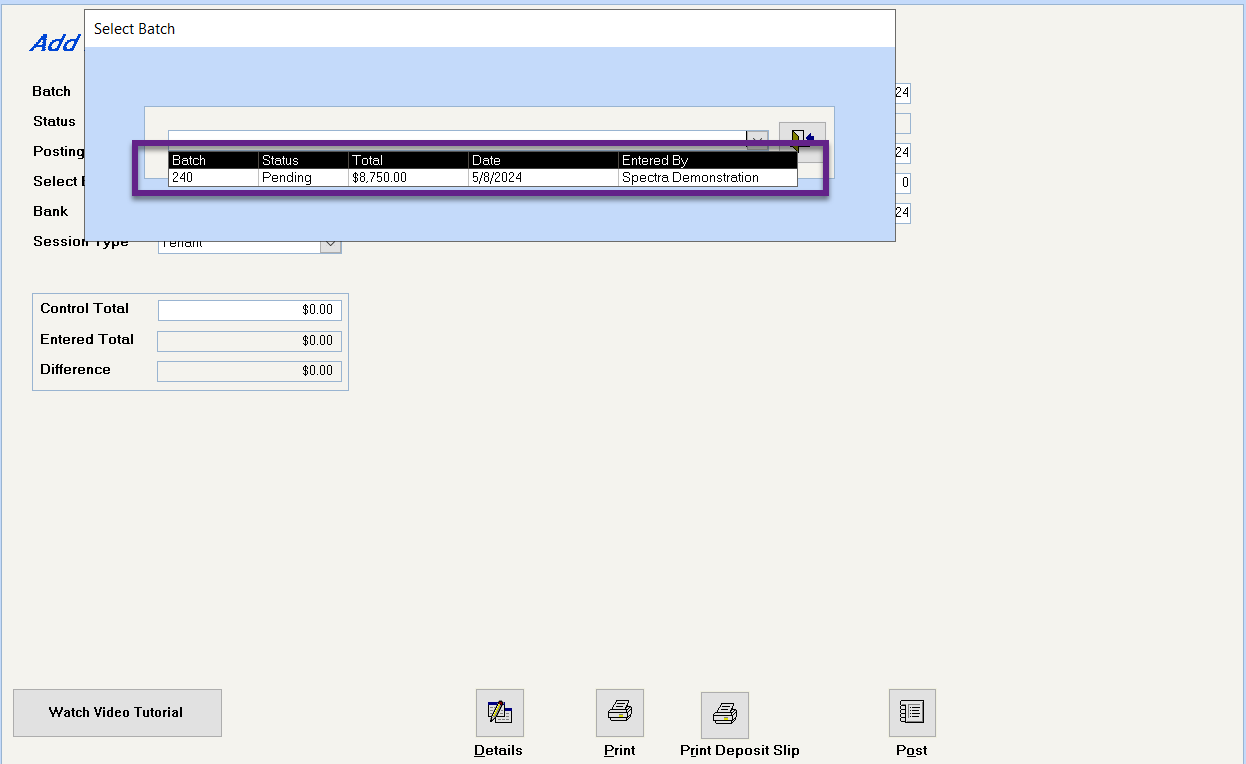
• Go to Banking – Receipts – Regular – click on the dropdown arrow beside the Batch number and select the batch created by the Import.TenantPay Payments process.
• Tenant Pay Charges: Refer back to the email notification because you have to enter a separate batch to record the Tenant Pay Fees. Enter a batch with session Type to Miscellaneous and enter the $3.15 as a negative amount.
• Example:
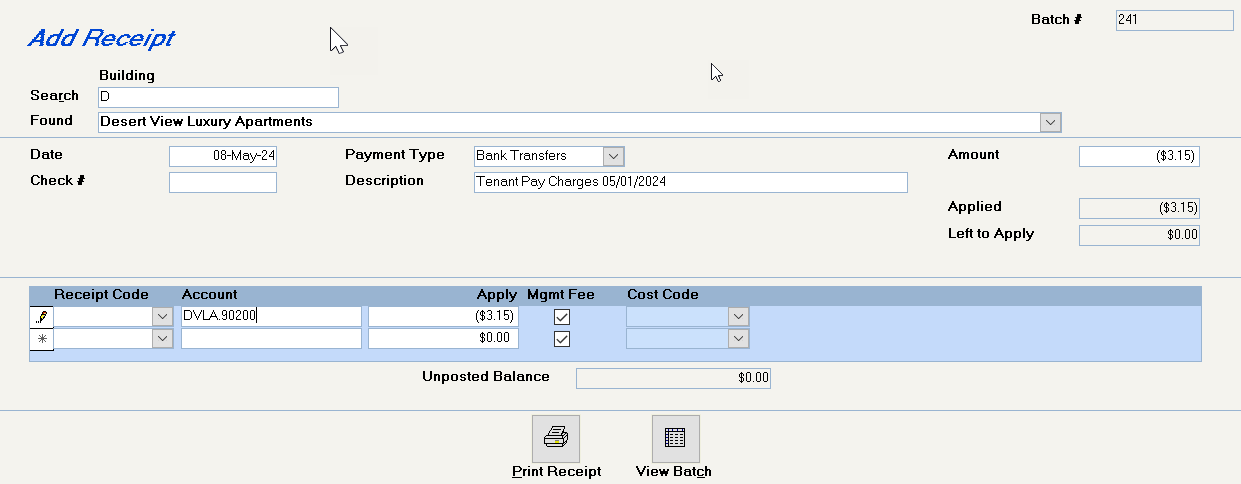
• Do not include any other banking transactions in this batch, so that your bank reconciliation report will show the exact amount deposited into your bank account by TenantPay.
When a Tenant Moves Out
Enter the Move Out date on the Tenant’s Lease, as you would normally do. Do not delete the TenantPay ID.
When a Tenant Moves In
Use the Tenant Setup Wizard to set the tenant up, as you would normally do.
Go to the former tenant’s Lease – Edit Lease Details screen and use
Go to the new tenant’s Lease – Edit Lease Details screen and use

Go to TenantPay’s website – Payee List and doubleclick on the same TenantPay ID. It will show the former tenant’s information. Update it now to show the new tenant’s Lease ID and name. The Unit number and TenantPay ID will remain the same. Click on Update when complete.
Sent the announcement letter to the new tenant with his TenantPay ID.
Sub Leases
Only one TenantPay ID is uploaded per unit, so only the tenant on the Master Lease will upload. When you are in TenantPay’s Admin portal, you can create additional TenantPay IDs and put these on the sub lease tenant.
If you have a situation where the sub lease tenant will be using TenantPay, but the tenant on the master lease will not, then switch them around, so that the tenant using TenantPay will be the master lease.
Already Using Tenant Pay?
If your tenants already exist in TenantPay and you are now using SPECTRA’s TenantPay Interface, you need to do two things:
1. Edit the Tenant’s record in TenantPay to add the TenantPay LeaseID in the “Other” field.
2. Edit the Tenant’s Lease Detail screen in SPECTRA to add the TenantPay ID #