Cancel/Void Checks
Bank
Select the bank that the check was issued from.
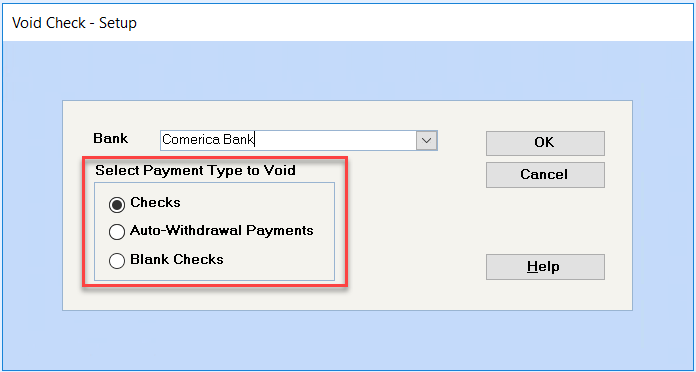
Select Payment Type to Void
Select; Checks, Auto-Withdrawal Payments or Blank Checks.
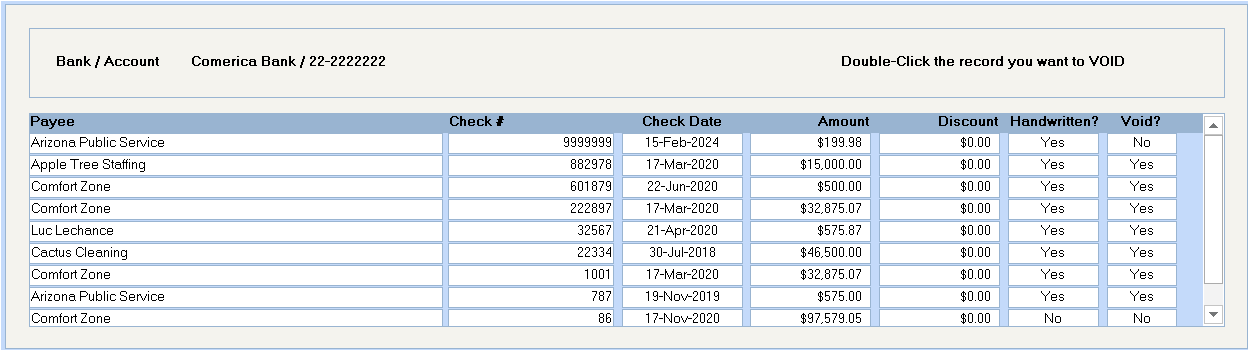
Click on OK to continue or Cancel to return to the menu. All outstanding checks for the selected bank and payment type will display on the screen in chronological order beginning with the most check. The second last column indicates if the check was a handwritten check.
When you have found the check that you want to cancel, double click, anywhere on that line, to cancel it.
You will be prompted to confirm the cancellation. Click on OK to continue.

If you are using accrual accounting, the system needs to reverse the G/L postings of the invoices, which requires that the invoices be posted to the G/L prior to this step. The invoices must be posted to the G/L even if the invoices are to be reinstated. Go to Supplier – Tasks – Invoices – Post Invoice Expenses to G/L and post all invoices. Then, try to void the check again.

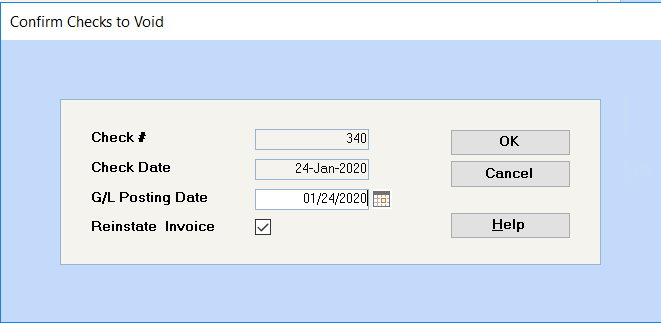
The G/L posting date is the date that the cancellation will show in the General Ledger, and it defaults to your system date. If you want to cancel the check on the same date that it was issued, you must change the G/L posting date.
The default is that the system will reinstate the invoice(s), which means that the invoices will be set back up as outstanding payables to be paid at a later time. If you want to cancel the invoice(s) along with the check, remove the check from the Reinstate Invoice box.
Click on OK to process this cancellation. The above screen will redisplay with a "Yes" in the Void column beside the cancelled check.
Report
A list of voided or cancelled checks can be printed from the Banking – Select a Report – Checks – Check Register program by including the Voided Only option.
 Watch Video Tutorial